*This article includes mentions of merchants or brands who are partners of DoorDash, and DoorDash may receive a commission if you choose to make a purchase from these merchants or brands.
’Tis the season to be ball-y… if you host a donut hole decorating party. You’ll decorate orbs of delicious, sugary-fried goodness that can be devoured on the spot, packaged as to-go pops or one-bite desserts (best eaten the same day for freshness in all cases), or hung on an ornament tree and presented as the ultimate holiday dessert. The best part? You can buy everything ready-made, so there’s no cooking involved.
Ready to set up a baller donut hole activity in no time? Here’s how:
1. Determine where you’ll get your donut holes.
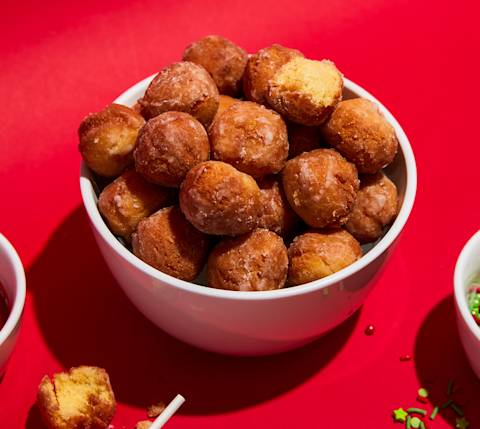
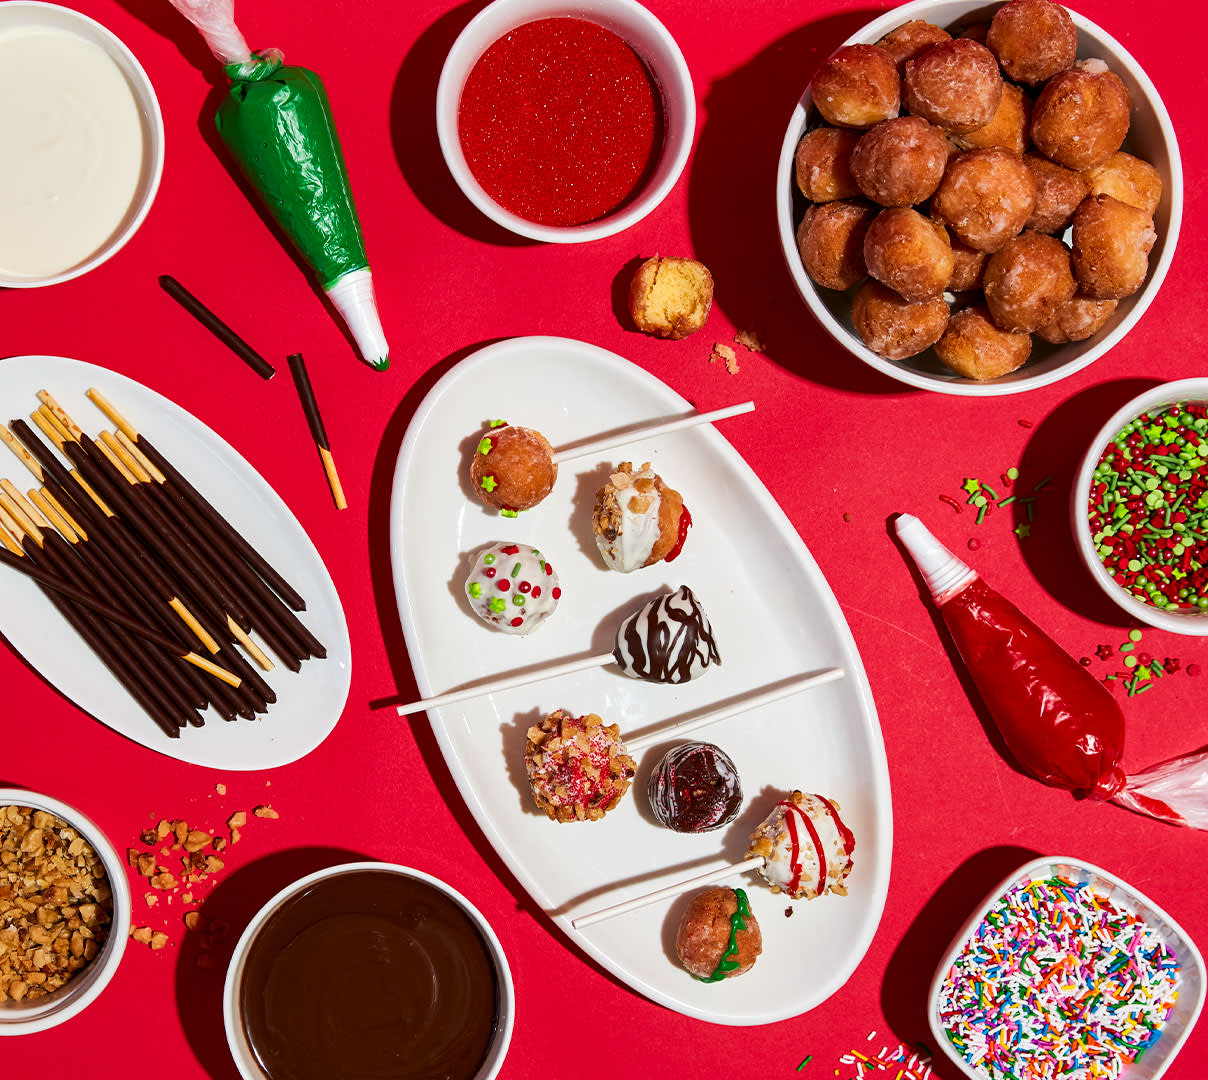
Donut holes should be purchased the day of your event for optimal freshness, but it’s a good idea to decide where you’re going to get them. We found the small, more cakey, 1-½-inch old-fashioned donut holes, available in bulk from the bakery section at grocery chains, work best for size and sustained freshness. Get them unglazed or glazed but avoid powdered, if possible. Fatter, larger donut-shop holes work, too. As for how many to get, expect at least nine donut holes per person — one as a decorating test drive, a couple to eat, and six to decorate.
2. Decide your donut holes’ base coat.
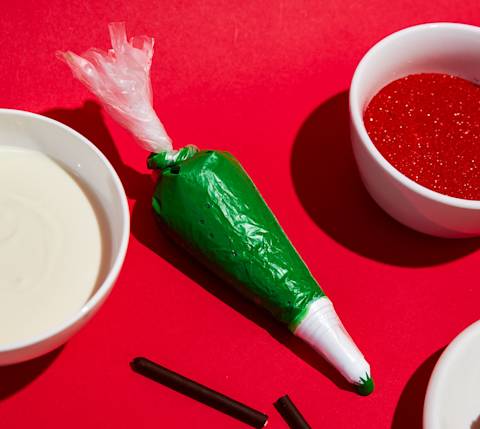
You’ll need to cover your donut holes with a base coat; they look pretty and will ensure festive toppings stick. You can use melted chocolate, melted white chocolate or vanilla baking chips, a big tube of white cookie icing, or all of the above. Whatever you choose, it must be able to dry into a firm coat so your donut holes aren’t gooey and instead are easy to package and eat.
3. Select your edible decorations.
You’ll want colorful, edible stuff to use to decorate your donut holes. Chunky sprinkles in holiday colors or shapes are great, as are chopped toasted nuts. You can get creative, too. Dig into your leftover Halloween candy and use crushed Butterfingers, or smash a couple of candy canes or Oreo cookies.
Don’t forget to include some little tubes of Betty Crocker Cookie Icing in various holiday colors; they’ll allow you to draw polka dots and other fun holiday-ornament-like designs on your donut holes. Betty Crocker Glitter Gels look beautiful and hold their shape best right out of the tube (squeeze out the initial liquid when you first open the tube), but they take several hours to truly dry. Store-bought or homemade fine-tipped tubes of writing icing are great as long as the icing is thick; otherwise it may drip down the rounded surfaces.
4. Decide how you want to package your donut holes.
It’s likely your colorful creations will be eaten before ever leaving the kitchen. But if you want to make them portable, there are plenty of pretty ways to do it:
Plan for each decorator to put his or her dried donut holes into mini cupcake liners and then into a small paper craft box or cellophane bag.
Make them into donut pops by buying and inserting Wilton-brand or other cookie sticks into the base of your decorated donut holes. Once dry, they can be wrapped in cellophane and tied with ribbon.
Make an edible ornament tree: Once donut holes are decorated and set, use an ornament hook (with one side unbent into an L-shape to insert into one side of each donut hole so it will stand upright), and hang them on a tabletop ornament holder.
5. Buy everything you need.
Make a shopping list based on what you decide from above and buy everything — you can have it all delivered on DoorDash. Keep in mind you may also want to get parchment paper to put the donut holes on while they’re drying, though a plate will work, too.
Here’s what I would get for a six-person decorating party:
54 donut holes or 2 30-hole tubs Safeway-brand or other market bakery brand
Parchment paper
2 bags white chocolate chips or 1 bag white chocolate and 1 bag semisweet chocolate
Vegetable oil — only if you’re out; you need the littlest bit to soften the chocolate
1 large tube white cookie icing
1 box Betty Crocker Cookie Icing
1 box Betty Crocker Glitter Gels
2 to 3 different shakers of fun, colorful fancy sprinkles
2 bags Milton 6-inch cookie sticks (20 count)
36 small cellophane bags and 2 rolls of colorful ribbon or 1 pack mini cupcake liners plus 6 small white boxes or paper lunch bags or ornament hooks and a tabletop ornament tree
6. Set up all the decorating supplies on a table.
Place all the decorating materials in the middle of the table, including cookie sticks if you’re making donut-hole pops. Make stations around the table denoted by a piece of parchment paper so each decorator knows where to put their edible works of art.
When it’s time to decorate, place the donut holes in the middle of the table. Hold off on melting your selected base in a microwave or in a double-boiler on the stove until everyone is ready to decorate. When you melt the chocolate, add a few drops of neutral-flavored vegetable oil; the chocolate will take longer to dry, but it will be smoother and easier to use. It will firm up with a little patience. (You can also avoid melting anything by using tubed cookie icing.)
7. Decorate.
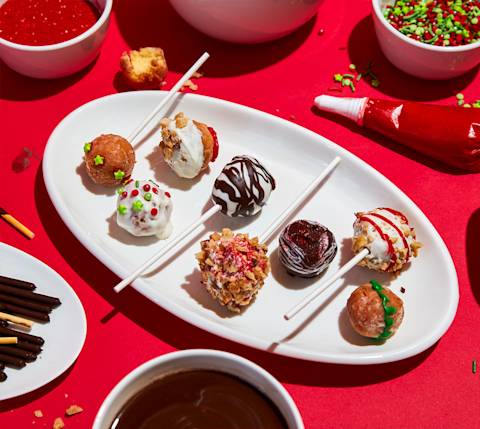
For balls: First dip your donut hole into the melted chocolate or drizzle with cookie icing to cover the top. Then coat with toppings like sprinkles or nuts, or wait for the coat to dry and then decorate with colored writing icing. Set decorated donut holes on parchment paper to dry.
If you make pops, you can insert the stick first and then use it as a handle for dunking the donut holes in the melted base coat. Once you’ve finished decorating them, you can stand them up in a juice glass or rocks glass to dry.
8. Package.
Once the donut holes are dry, package them as you wish: in cellophane bags wrapped with accompanying twisty-ties or ribbon, in mini cupcake holders nestled into a box, or on ornament hooks and hung for all to see — and snack on!
PHOTO CREDIT:
Photographer: Paul Quitoriano
Food Styling: Lena Abraham
Art Direction: Sarah Ceniceros Gomez